AeroPress Brewing Guide: Original vs Inverted Method Explained

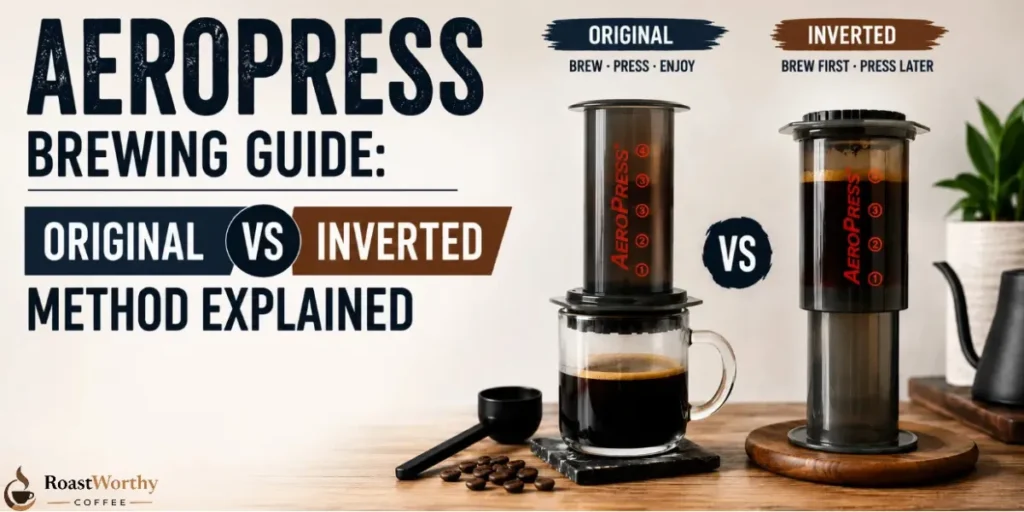
TL;DR: The original method is faster and cleaner. The inverted method gives you more control over steep time and extraction. Neither is wrong. Both reward precision. Pick based on what you're brewing — and how much mess you can handle. ☕
The AeroPress brewing guide debate has been going on since Alan Adler shipped the first unit in 2005. Original or inverted? Paper or metal? Two minutes or four?
Here's the real answer: it depends on your coffee, your grind, and what you want in the cup.
Let's break both methods down — numbers, ratios, and all.
What Is the AeroPress?
It's a plastic cylinder, a plunger, and a filter cap. That's it.
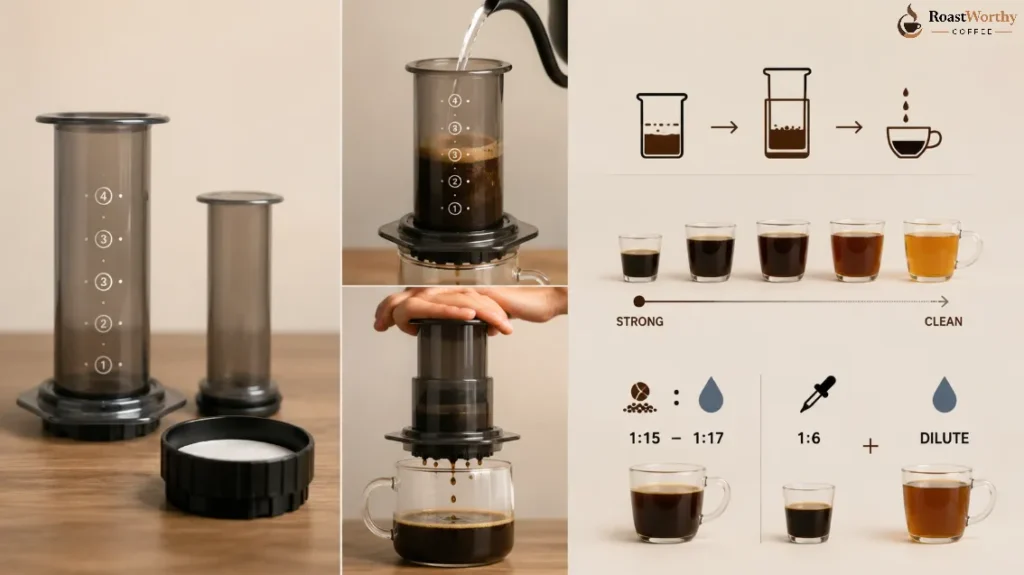
What it does with that simplicity is remarkable. It combines immersion brewing (like a French press) with pressure-driven filtration.
The result is a concentrated, full-flavored cup that can be dialed anywhere from espresso-style intensity to a clean, pour-over-adjacent filter coffee.
AeroPress pressure isn't true espresso pressure (9 bar). It's closer to 0.35–0.75 bar — manual, human-generated. But that gentle push through a fine grind still produces a denser, more syrupy extraction than gravity brewing alone.
The brew ratio matters. A standard recipe runs 1:15 to 1:17 (coffee to water). Pull it to 1:6 for a concentrate. Dilute to taste.
The Original (Standard) Method
This is the AeroPress as Alan Adler designed it. Filter down. Plunger up. Coffee brews, then you press.
How to Brew — Original Method
What you need:
Steps:
- Place filter in cap. Rinse it with hot water — this removes papery taste and preheats the brewer.
- Lock the cap. Set AeroPress on your mug.
- Add 15g of ground coffee.
- Start timer. Pour 230ml of water steadily over 30 seconds.
- Stir 10 seconds.
- Insert plunger. Press slowly over 20–30 seconds.
- Stop pressing when you hear the hiss.
Total brew time: 1:30 to 2:00 minutes.
What the original method does well
It's fast. It's simple. If you're brewing light roasts where you want clarity and bright acidity to come through, the original method with a paper filter is the move.
The downside? Premature drip-through. Once water hits the grounds, some liquid passes the filter before you're ready to press. With a coarser grind or a longer steep time, that uneven pre-extraction becomes a problem.
The Inverted Method
Someone — nobody's fully sure who, but the AeroPress World Championship community popularized it — flipped the device upside down. The plunger goes in first. The chamber sits on top of it, open end up, like an immersion vessel.
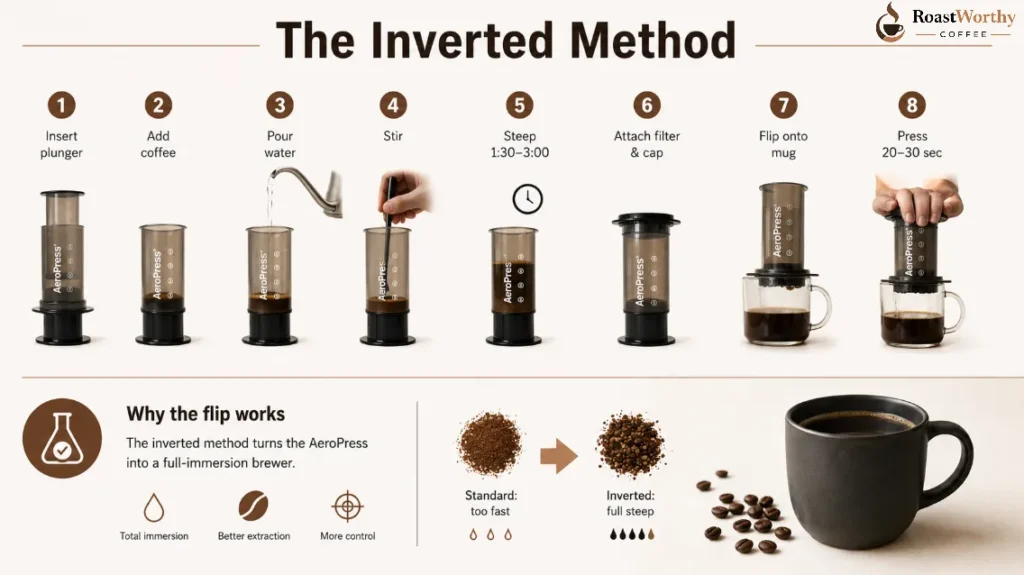
No drip-through. Complete control over steep time.
How to Brew — Inverted Method
What you need:
Steps:
- Push plunger into chamber. Stop when the rubber seal is 20–25mm inside — just enough to hold water without collapsing.
- Stand the AeroPress upside down on your counter — plunger down, open chamber up.
- Add ground coffee.
- Start timer. Pour water. Fill to target weight.
- Stir 5–10 seconds.
- Steep for 1:30 to 3:00 minutes depending on grind and roast.
- Attach rinsed filter and cap. Grip firmly — both hands.
- Flip onto mug in one confident motion. ⚗️
- Press over 20–30 seconds. Stop at the hiss.
Total brew time: 2:00 to 4:00 minutes.
Why the flip works
The inverted method turns the AeroPress into a full-immersion brewer. Every gram of coffee is in contact with water for the full steep time. No bypassed grounds. No early drip.
This matters most with coarser grinds. A French press-adjacent grind on the standard method just leaks through before extraction is complete. Invert it, and you get the steep time you actually need.
It also gives you something the standard method doesn't: repeatability on longer extractions. If you're chasing a specific flavor from a particular origin — say, a Colombian washed process where you want to isolate its stone fruit clarity — a controlled 2:30 steep at 90°C gives you a real variable to dial.
Original vs Inverted: Head to Head
| Variable | Original Method | Inverted Method |
|---|---|---|
| Steep control | Limited | Full |
| Drip-through risk | High with coarse grind | None |
| Brew time | 1:30–2:00 min | 2:00–4:00 min |
| Best grind size | Medium-fine | Medium to medium-coarse |
| Spill risk | Low | Higher (during flip) |
| Best for | Light roasts, clean cups | All roasts, full immersion |
| Consistency | Good | Better |
| Learning curve | Low | Medium |
The original is the right call for beginners and anyone who wants a quick, clean cup. The inverted is the right call once you know what flavor you're chasing and want the variables locked in.
Paper Filter vs Metal Filter
This choice shapes the cup as much as the method. Don't skip it. ☕
Paper Filter
Paper blocks coffee oils and micro-fines. What comes through is clean, clear, and bright.
If you're brewing a light Ethiopian natural and you want those raspberry and jasmine notes to pop — use paper. Oils mute delicate aromas. Paper lets them speak.
Paper also has one underrated benefit: it's more forgiving. Because it catches everything coarser than ~20 microns, minor grind inconsistency doesn't hurt you as badly.
Metal Filter
The AeroPress Stainless Steel Filter has laser-cut holes at 178 microns. That's precise enough to block most grounds, but wide enough to let coffee oils and very fine particles pass.
What that means in the cup: heavier body, more texture, a slight French press character. With a medium or dark roast, that extra body rounds out the bitterness into something almost syrupy.
The tradeoff is clarity. If the coffee has delicate floral or citrus notes, the oils can muffle them. For a bold single origin or an espresso-style concentrate, the metal filter earns its place.
Quick rule: Light roast → paper. Medium-dark → metal. Espresso-style concentrate → metal.
AeroPress vs French Press: Where the Lines Are
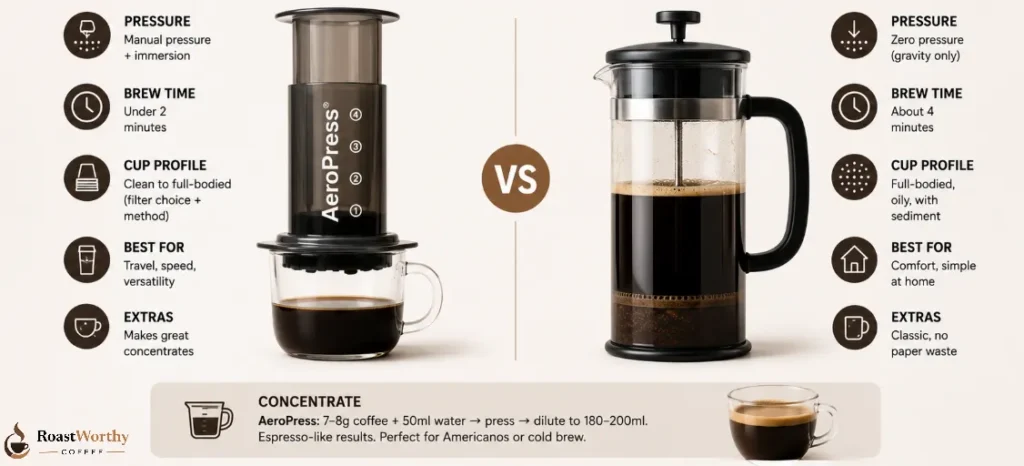
People reach for the AeroPress thinking it's a French press alternative. Sometimes it is. But the mechanics are different.
A French press uses full immersion with zero pressure — gravity does the work. The result is heavy, oily, sediment-present coffee. That's by design.
The AeroPress adds manual pressure on top of immersion. That changes the extraction dynamic. You can get French press-level body (metal filter, inverted method) or pour-over clarity (paper filter, original method) from the same device.
The AeroPress also brews faster. A French press needs 4 minutes. The AeroPress can deliver a solid cup in under 2. For travel and portability, it's not close.
And the AeroPress brews a concentrate easily. Add 7–8g coffee to 50ml water, press, and dilute to 180–200ml. You get something resembling espresso — not identical, but close enough that an Americano or a cold brew concentrate works well from it.
Dialing In: Variables That Actually Matter
Water Temperature
Light roasts extract better at higher temperatures. Start at 90–96°C (194–205°F).
Dark roasts are more soluble — lower temps reduce bitterness. Try 82–88°C (180–190°F).
Most people brew too cold because they're afraid of bitterness. Under-extraction tastes worse than slight over-extraction. Start higher. Pull back only if the cup is genuinely harsh.
Grind Size
This is the variable that changes everything.
For the original method at a 2-minute brew: medium-fine. Think table salt.
For the inverted method at a 3-minute brew: medium. Think coarse sand.
Grinding finer increases extraction rate — useful for a shorter brew. Grinding coarser slows it down — useful for longer steep times.
Don't adjust temperature before adjusting grind. Grind size is the more precise lever.
Steep Time
1:00 to 1:30 for a concentrated espresso-style extraction with fine grind.
2:00 to 2:30 for a full-immersion cup with medium grind.
Up to 4:00 if you're using a coarser grind or a cold steep variation.
Taste it. Write it down. Roast it again. 🔥
The AeroPress World Championship Effect
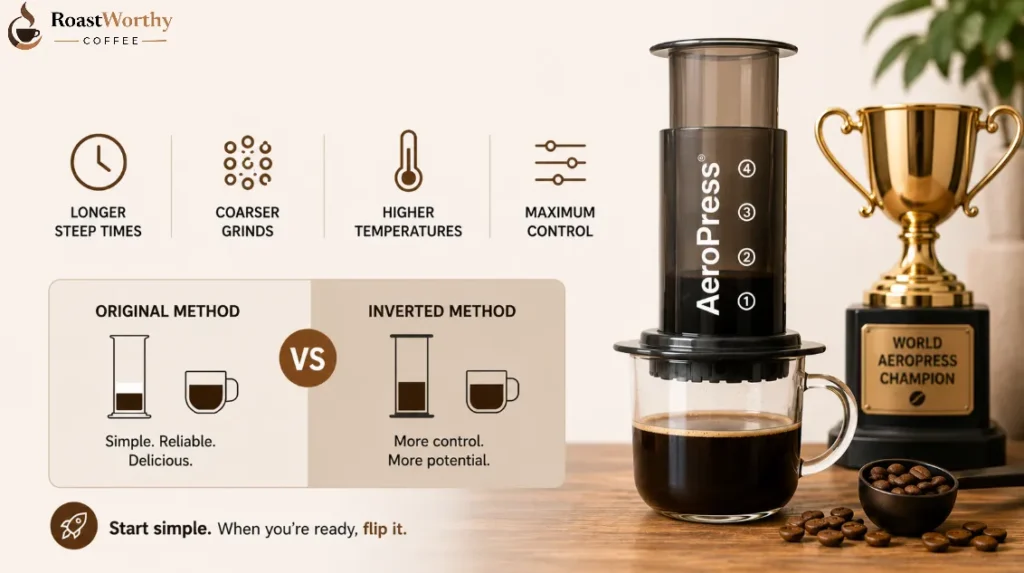
Since the first World AeroPress Championship in 2008, the inverted method has dominated. Most winning recipes use longer steep times, coarser grinds, and higher water temperatures than the standard recipe on the box.
That doesn't mean the original method is wrong. It means competition-focused brewers wanted maximum control and chose inverted to get it.
For home brewing — especially if you're just getting started — the original method with a quality paper filter and a medium-fine grind will produce a cup you won't want to stop drinking.
Once you want to push further, flip it.
Common AeroPress Mistakes
FAQ: AeroPress Brewing
What is the AeroPress inverted method?
It means brewing with the AeroPress upside down — plunger inserted first, open chamber up. This prevents premature drip-through and allows full control over steep time. Flip onto your mug when ready, then press.
Is the AeroPress inverted method better than the original?
More consistent, yes — especially with coarser grinds or longer steep times. The inverted method eliminates early drip-through. But the original method is simpler and produces excellent cups with a medium-fine grind and a 1:30–2:00 brew time.
What's the best grind size for AeroPress?
Medium-fine for the original method (1:30–2:00 min). Medium for the inverted method (2:00–3:00 min). Adjust based on taste — sour means grind finer or brew longer; bitter means grind coarser or brew shorter.
Should I use a paper or metal filter in my AeroPress?
Paper filters produce a cleaner, brighter cup — best for light roasts and delicate origins. Metal filters let oils through for a heavier, French press-style body — best for medium to dark roasts and espresso-style brews.
Can the AeroPress make espresso?
Not true espresso — that requires 9 bar of pressure. But the AeroPress can produce an espresso-style concentrate using a fine grind, short steep (under 60 seconds), and lower water volume (40–60ml). Close enough for Americanos and milk drinks.
What water temperature should I use for AeroPress?
Light roasts: 90–96°C (194–205°F). Medium roasts: 88–92°C (190–198°F). Dark roasts: 82–88°C (180–190°F). Cooler water slows extraction and reduces bitterness — useful for darker, more soluble roasts.
More Recommendations from RoastWorthy Coffee