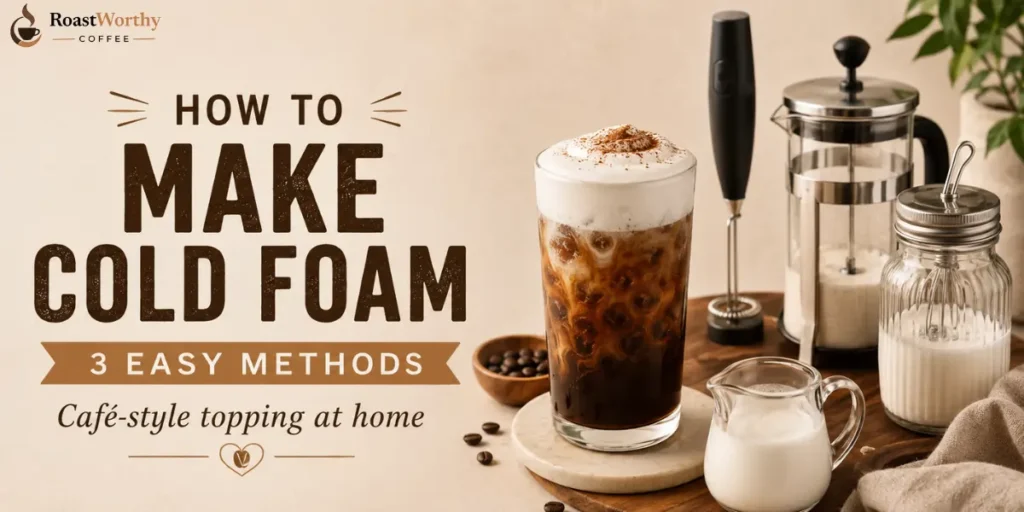
How to Make Cold Foam: 3 Easy Methods for Café-Style Topping at Home

Cold foam is just cold milk whipped until it holds air. No heat. No steam wand. That's the whole trick.
You can make cold foam at home in under two minutes with gear you probably already own. It costs about 15 cents per drink versus the $1 upcharge at the counter.
Here's what's actually happening when you whip it. The agitation forces air into the milk proteins. Those proteins trap the air and hold their shape. The colder and lower-fat the milk, the better the hold. ⚗️
I tested all three methods below side by side. Same milk, same glass, same morning. The results were not equal. Let me show you, ranked by how much gear you have.
TL;DR: The Fastest Way to Make Cold Foam
Cold nonfat milk. Handheld frother. Thirty seconds. Pour over cold brew.
That's the floor. Everything else is variation. Add vanilla syrup for the café version. Add a splash of heavy cream for body.
The gear is cheap. The method is fast. Once you make cold foam at home, that $1 upcharge stops making any sense.
What Is Cold Foam, Exactly?
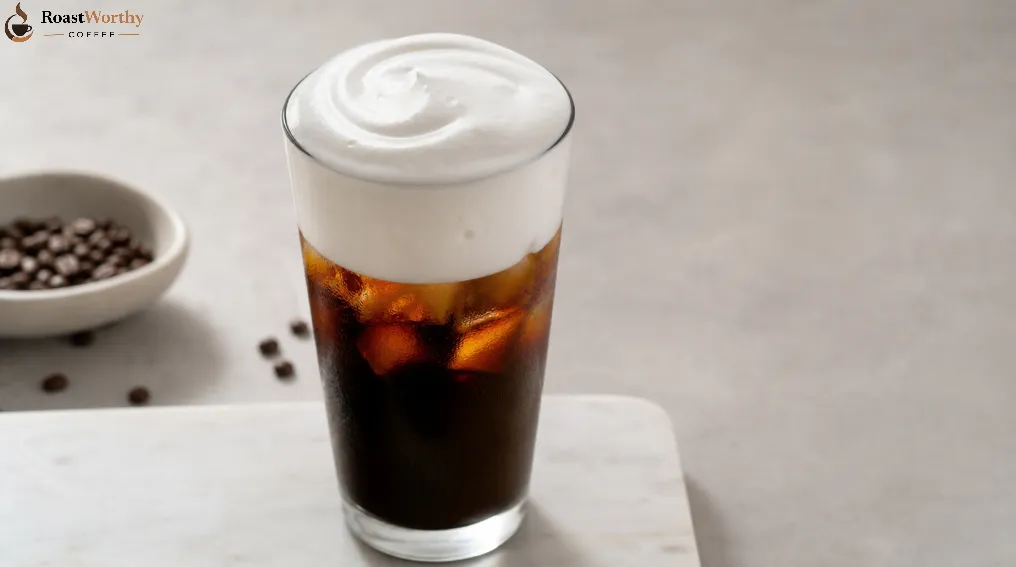
Cold foam is aerated cold milk that sits on top of iced coffee or cold brew. It's thick, glossy, and it floats.
It is not the same as the microfoam on a latte. That foam uses heat and steam. Cold foam uses cold milk and brute-force agitation instead.
The result is lighter and airier. It pours slow and sinks gradually into the drink. That slow sink is the signature. When it's done right, you get a clean white cap that holds for a good ten minutes before it melts into the coffee.
Baristas started layering it on cold brew because hot microfoam collapses the second it hits ice. Cold foam solved that. It's the only foam built for cold drinks.
Key takeaway: Cold foam = cold milk + air + no heat. Nonfat milk foams thickest. Cream-based versions taste richer but sit denser.
The Science: Why Nonfat Milk Foams Best
Fat is the enemy of stable foam. Here's why.
Fat globules interrupt the protein network that traps air. More fat means weaker bubbles that collapse faster. That's the chemistry. ⚗️
So nonfat milk produces the tallest, most stable cold foam. Whole milk foams too, just denser and flatter.
The proteins doing the work are casein and whey. They wrap around each air bubble and form a wall. Fat punches holes in that wall. Skim milk has almost no fat, so the walls stay intact and the foam stands tall.
Temperature matters just as much. Cold milk holds air better than warm milk because the proteins are more rigid. Pull your milk straight from the fridge. Never let it sit on the counter first.
If you want volume and that classic café-style cap, reach for skim. If you want richness over height, that's where heavy cream cold foam comes in. More on that below.
Write it down once and you'll never guess again: more fat = more flavor, less foam.
Method 1: The Handheld Milk Frother (Easiest)
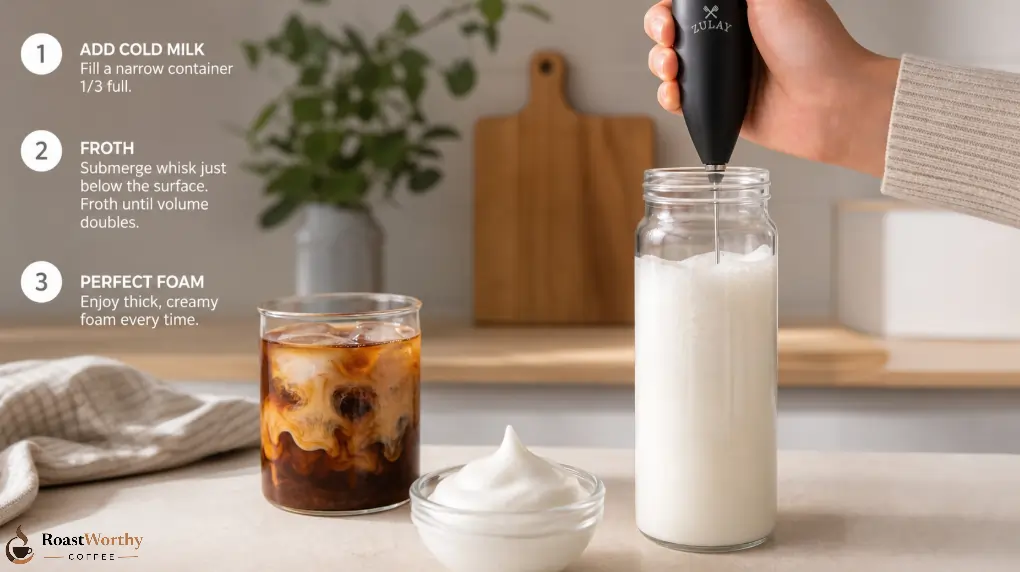
This is the method I reach for daily. A battery-powered frother costs about $10 and lives in a drawer.
What You Need
The Steps
- Pour 1/4 cup cold milk into a tall narrow container.
- Submerge the frother head just below the surface.
- Run it for 25–30 seconds, moving up and down slightly.
- Stop when the foam doubles in volume and holds a peak.
The narrow container matters. It concentrates the milk so the frother actually grabs it instead of splashing it up the sides.
Thirty seconds is the number. Under-frothing gives you bubbles, not foam. The texture should look like wet paint, not soap suds.
One detail people skip: keep the whisk near the surface, not at the bottom. The foam forms where air meets milk. Drop the whisk too deep and you're just stirring.
Spoon it over your cold brew. Done. This is the daily-driver method for a reason.
Method 2: The Mason Jar Shake (No Equipment)
Zero gear. Just a jar with a tight lid. This is your travel and camping method.
The Steps
- Add 1/4 cup cold nonfat milk to a mason jar.
- Seal the lid tight. Really tight.
- Shake hard for 60 seconds.
- Pour straight over ice, or microwave 10 seconds to set the foam.
Sixty seconds of shaking gets you about half the volume of a frother. It works. It's just more arm.
The microwave step is optional and slightly controversial. Ten seconds of low heat stabilizes the foam without warming the drink much. For a true cold foam, skip it and pour immediately.
Use a jar no more than half full. The foam needs empty space to expand into. Fill it past halfway and you'll just slosh liquid around with nowhere for the air to go.
This method tops out at medium foam. Fine for a quick fix. Not your best cap. But when you're away from your kitchen, it beats no foam at all.
Method 3: The Blender or French Press (Most Volume)
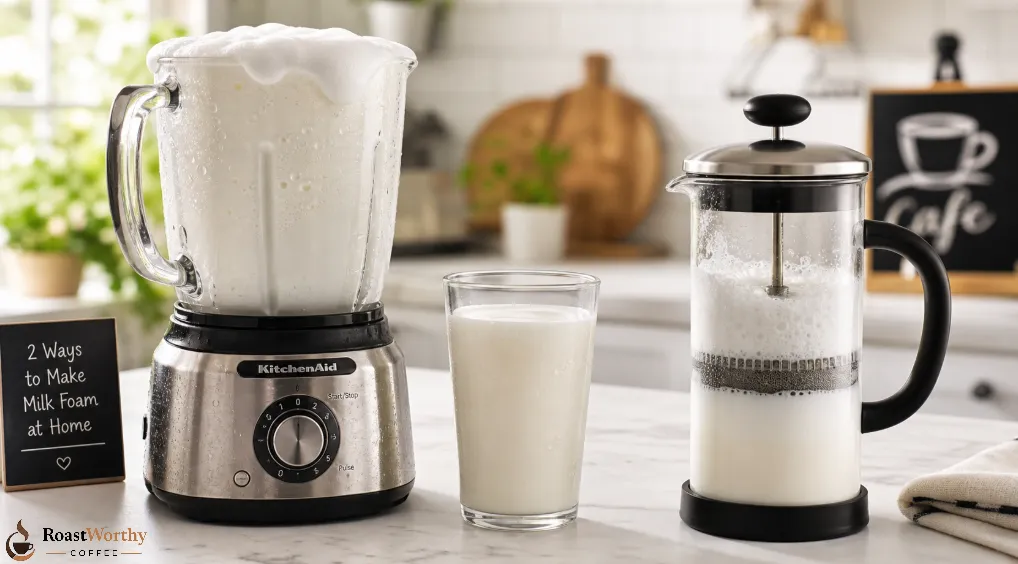
Want café-level volume for two drinks at once? Scale up with a blender or French press.
Blender Version
- Add 1/2 cup cold nonfat milk to a blender.
- Blend on high for 20–30 seconds.
- Pour the foam off the top.
A blender moves more air faster than anything else here. The downside is cleanup. You're washing a whole jug for one drink. Worth it when you're making four.
French Press Version
- Add 1/2 cup cold milk to the press.
- Pump the plunger up and down 30–40 times.
- The foam builds against the mesh screen fast.
The French press is honestly underrated here. The mesh screen does the same job as a frother whisk, just with more surface area. It produces the densest, most pourable foam of any no-machine method.
This is the move for serving guests. One batch tops three or four drinks. And you already own the press, so there's no extra spend.
How the 3 Methods Compare
| Method | Gear Cost | Time | Foam Volume | Best For |
|---|---|---|---|---|
| Handheld frother | ~$10 | 30 sec | High | Daily single drinks |
| Mason jar shake | $0 | 60 sec | Medium | Travel, no gear |
| Blender / French press | $0 (owned) | 30 sec | Highest | Multiple drinks |
All three work. The frother wins on convenience. The French press wins on volume. The jar wins when you've got nothing else.
How to Make Vanilla Cold Foam (Café Recipe)
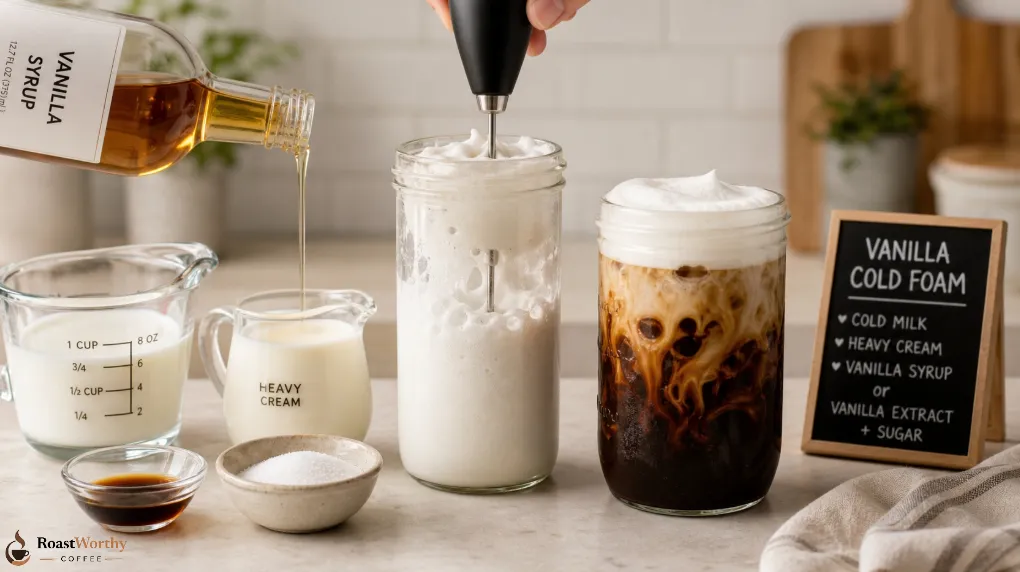
This is the version people actually want. Vanilla cold foam coffee is the most-ordered cold foam variation, and it's stupid easy to copy.
Ratio That Works
Add everything to your frother container at once. Froth 30 seconds. The syrup adds a little sugar, which actually helps the foam hold longer.
That heavy cream splash is the secret. It bridges the gap between airy nonfat foam and the rich sweet cream cold foam the big chains sell. You get height and mouthfeel.
No vanilla syrup? Mix 1 teaspoon sugar with a few drops of vanilla extract. It's not identical, but it's close. Skip the extract and use maple syrup for a fall version.
Taste it. Adjust the syrup. Froth it again. That's the whole loop.
Sweet Cream and Heavy Cream Variations
Two richer options for when you want indulgence over height.
Sweet cream cold foam uses a blend of milk, heavy cream, and vanilla syrup. The classic ratio is roughly 2 parts milk to 1 part heavy cream, plus syrup to taste. It foams less but tastes luxurious.
Heavy cream cold foam goes even denser. Use half-and-half or a 50/50 cream-milk mix. It barely foams, but it pours like a thick blanket over cold brew. Some people prefer this. I get it.
The trade-off is always the same. Cream gives you body and a slower, silkier pour. It does not give you height. Don't expect a tall cap from a cream-heavy mix — that's not what it's for.
Quick rule: nonfat for volume, cream for flavor. Blend the two and you've got the best of both.
Cold Foam Topping Ideas Beyond Coffee
Cold foam isn't just for cold brew. The same cold foam topping works on iced matcha, chai, and even cold chocolate.
Dust the top with cinnamon, cocoa, or matcha powder. The foam holds the topping instead of letting it sink straight through. That's a small trick that makes a home drink look like it came off a menu.
Common Mistakes to Avoid
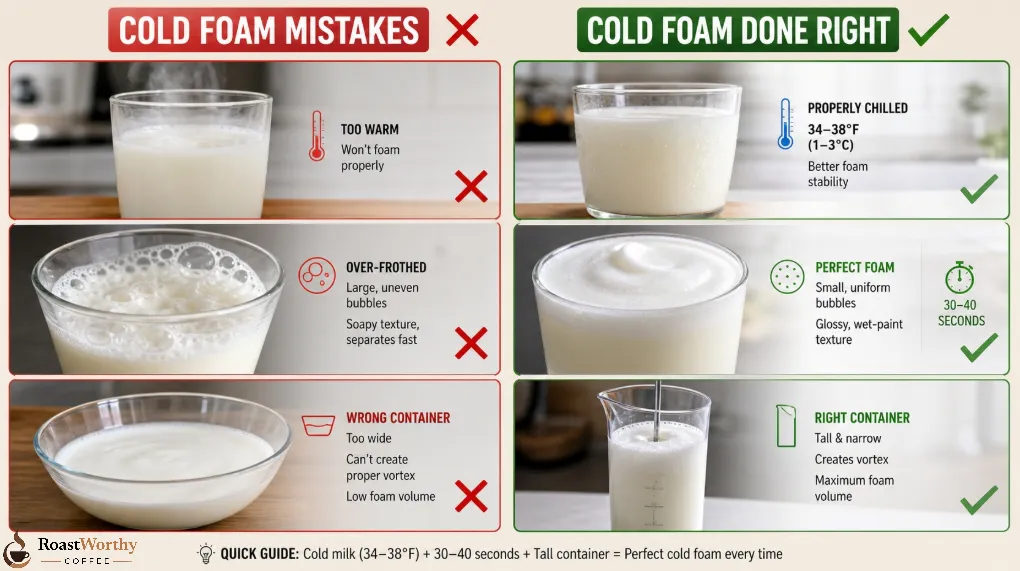
I've watched a lot of people botch this. Three errors come up constantly.
One more: don't froth in a wide bowl. The milk spreads thin and the whisk can't catch it. Narrow and tall, every time.
Your first batch might be flat or bubbly. Make it anyway. Then adjust and go again.
Best Milk and Alternatives for Cold Foam
Not all milk foams equally. Here's the honest ranking.
If you're dairy-free, barista-blend oat milk is your answer. The added stabilizers help it foam almost like skim. Regular oat milk foams worse — look for “barista” on the carton. Almond milk is the one to avoid.
Frequently Asked Questions
How do you make cold foam without a frother?
Shake 1/4 cup cold nonfat milk in a sealed mason jar for 60 seconds. Or pump it in a French press 30–40 times. Both work without any special gear.
What milk is best for cold foam?
Nonfat milk foams the thickest and holds longest because fat weakens the foam structure. For dairy-free, barista-blend oat milk is the closest match.
Why won't my cold foam hold its shape?
You likely used milk with too much fat, or your milk wasn't cold enough. Switch to chilled nonfat milk and stop frothing at the 30-second peak.
Is cold foam the same as whipped cream?
No. Whipped cream is whipped heavy cream and is much denser and sweeter. Cold foam is aerated cold milk, far lighter, and built to float and slowly sink.
Can you make vanilla cold foam at home?
Yes. Add 1 tablespoon vanilla syrup to 1/4 cup cold nonfat milk and froth for 30 seconds. The sugar actually helps the foam hold longer.
How long does cold foam last?
Fresh cold foam holds its texture for about 10–15 minutes. Make it right before you pour for the best results.
More Recommendations from RoastWorthy Coffee